
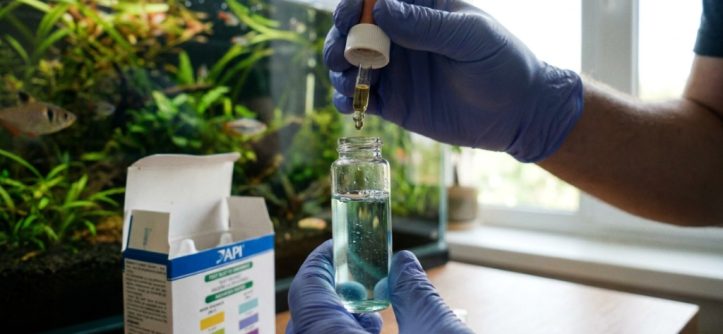
You’ve set up your tank, added fish, and admired your aquascape. But maintaining a healthy aquarium isn’t just about feeding and cleaning—it’s about understanding the invisible chemistry that keeps your fish alive. Guessing water parameters is a recipe for disaster, and that’s where a reliable testing solution becomes non-negotiable. The problem is that the market is flooded with options, from single-test strips to expensive digital monitors. For most hobbyists, the search for the best aquarium water test kit comes down to a balance between accuracy, ease of use, and cost. This guide breaks down the different types of testing methods, explains what the results actually mean, and helps you choose the right tool for your specific setup—whether you’re keeping a small betta tank or a heavily planted community aquarium.
Key Takeaways
- Test for the right parameters: At minimum, you need to monitor ammonia, nitrite, nitrate, and pH weekly to understand your tank’s nitrogen cycle.
- Liquid tests are more accurate than strips: Drop-based kits generally provide more reliable results and are better for tracking subtle parameter changes.
- All-in-one strips offer unmatched convenience: For quick daily checks, 8-in-1 strips offer speed and ease, but they are lower in accuracy than liquid reagents.
- Match the kit to your needs: A beginner might prefer simple strips, while a breeder or reef keeper needs high-accuracy liquid tests or digital monitors.
Why Water Testing Matters More Than You Think
Fish biology produces waste constantly. Uneaten food and decaying plants release ammonia, which is highly toxic. A healthy filter converts ammonia into nitrite (also toxic), and then into nitrate (less toxic, removed by water changes). If this “nitrogen cycle” stalls, your fish suffer from stress, disease, or sudden death. You cannot see ammonia, nitrite, or pH levels, so you need a reliable measurement method to avoid invisible catastrophes.
Testing isn’t just for emergencies. It helps you determine the right frequency for water changes, alerts you to issues before fish show symptoms, and verifies that your filter media is working efficiently. Testing regularly also helps you differentiate between “new tank syndrome” and “old tank syndrome,” which require different treatments.
Liquid Test Kits: The Gold Standard
The most common recommendation you’ll hear from experienced aquarists is to use liquid reagent tests. These kits work by adding specific drops to a water sample and comparing the resulting color against a chart after a set amount of time. They are widely considered the industry standard for accuracy.
Pros and Cons of Liquid Reagents
The primary advantage here is reliability. Liquid tests are much less prone to false negatives than test strips, meaning they are better at detecting low levels of ammonia and nitrite that could still harm fish. They also allow you to read the exact chemical concentration rather than an approximate range. The downside is time and finesse. You have to shake bottles, count drops, and watch timers, which can feel tedious during a busy week.
However, the accuracy is worth the extra minute of effort, especially during the initial cycling phase (the first 4–6 weeks) when ammonia spikes are common. If you are dealing with sick fish, a precise reading is critical to determining the correct dosage of medication or the size of the water change needed.
The Value of Master Test Kits
If you have a freshwater community tank, buying a bundle with multiple test tubes is often the most economical path. These kits usually include separate droppers for pH, High-Range pH, Ammonia, Nitrite, and Nitrate. They last for a long time—often up to 800 tests per bottle—which makes them cheaper per test than most strips in the long run. For these reasons, many hobbyists consider these “master” kits to be the best aquarium water test kit for serious fish keeping.
Test Strips: Speed and Convenience
Test strips are a different beast entirely. You simply dip a strip into the tank, swirl it, and wait 30–60 seconds for the pads to change color. You then compare the strip to a color chart on the bottle. This eliminates the need for tubes, shaking bottles, and rinsing equipment.
When Should You Use Strips?
Strips are perfect for quick health checks. If you are in a hurry but want to verify that nothing has changed drastically since your last water change, a strip is a safe bet. They are also excellent for beginners who feel overwhelmed by the complexity of test tubes. Using a strip to learn about pH and alkalinity is better than not testing at all.
Modern multi-parameter strips have also improved in quality. While they don’t give you the fine numeric accuracy of liquid tests, they are usually sufficient to tell you if ammonia is “zero” or “dangerously high.” You should realize, however, that the color pads on a strip are tiny, and differentiating between closely related shades (e.g., 20 ppm vs. 40 ppm nitrate) can be challenging, even under bright white light.
Choosing a Multi-Parameter Strip
When shopping for strips, look for “all-in-one” options that check 5 to 8 parameters. A dedicated 8-in-1 strip helpfully includes less-common tests like General Hardness (GH), Carbonate Hardness (KH), and Chlorine, which are vital if you use tap water. While these strips generally read in broader increments, they are user-friendly and make regular testing a less dreaded chore.
Digital Monitors and Photometers
At the top end of the price spectrum are digital devices. There are two main types: continuous monitors (like probes that stay in the tank) and handheld photometers (where you add reagents to a vial and insert it into a device that measures light to produce a digital readout).
Digital tools are fantastic for specific parameters, particularly pH. But they are fallible and require calibration. A photometer is the most accurate method available to the average hobbyist, but they are expensive and require you to purchase specific reagents for each test. If you are keeping sensitive fish (like discus) or running a reef tank where low-level phosphate matters, the cost is justified. For the standard community tank, however, the high price is likely overkill.
Interpreting Results: What Do the Numbers Mean?
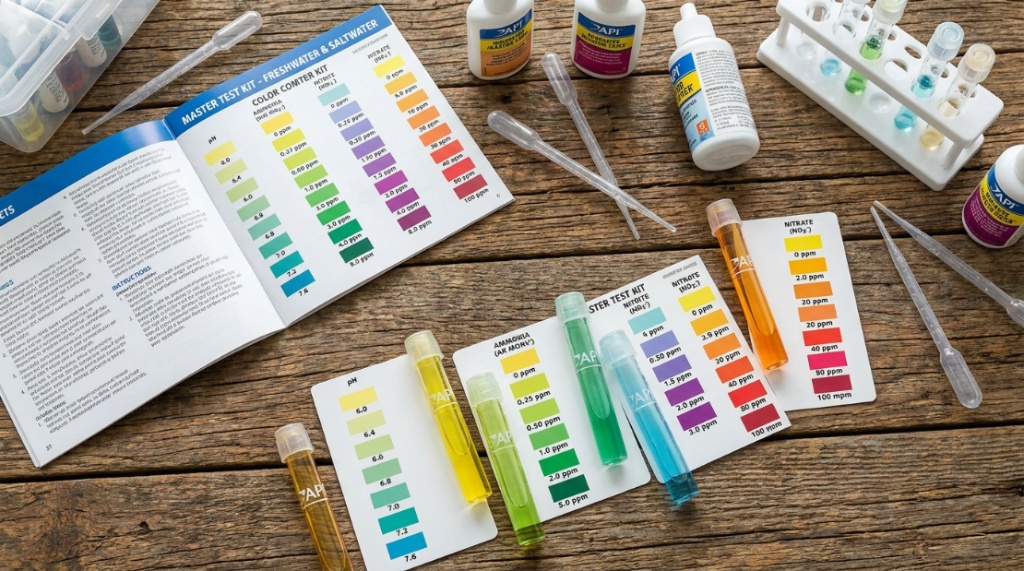
Knowing how to test is only half the battle. You need to interpret the results to take action. Relying on a tool without understanding the chemistry is like owning a car but never reading the dashboard. Here is a quick guide on what your tests should show:
- Ammonia: Should always be 0 ppm. A reading above 0 indicates overfeeding, overstocking, or a filter that isn’t fully cycled.
- Nitrite: Should always be 0 ppm. Elevated nitrite blocks oxygen flow in fish blood.
- Nitrate: Should be under 40 ppm (ideally under 20 ppm). This is removed by water changes.
- pH: Should remain stable. A consistent pH of 7.0 is fine; a fluctuating pH is stress-inducing.
- Hardness (GH/KH): Helps stabilize pH. If your pH is crashing, you likely have low KH.
If you see elevated ammonia or nitrite, do not add more chemicals blindly. You should first perform an immediate partial water change (25–50%) to dilute the toxins. Then, figure out the root cause: have you cleaned the filter with tap water recently (killing the bacteria)? Did you add too many fish at once?
Common Mistakes When Testing
Many inaccurate results are user error, not equipment failure. To get the best results from any kit, avoid these common traps:
- Cross-contamination: Rinsing the test tube with tap water might leave chlorine or heavy metals that react with the reagents. Rinse with tank water or distilled water instead.
- Not shaking reagents: Some solutions, especially Nitrate #1 and #2, settle over time. If you don’t shake them hard for a full minute, you will get a false low reading.
- Testing immediately after water change: New water often has different parameters than the tank water. Wait at least an hour for the mixture to homogenize before testing.
- Misreading the timer: Ammonia tests often take 5 minutes to develop color. Reading them at 3 minutes might show “0” when actually the level is spiking.
How Often Should You Test?
The frequency of testing depends entirely on the maturity of your tank. A rigid weekly schedule is not always necessary if your tank is stable. However, your testing schedule should change based on the lifecycle of the aquarium:
- New Tanks (Cycle phase): Test daily for ammonia and nitrite until you see them spike and then fall to zero. This protects your fish during the break-in period.
- Established tanks (3+ months): Test bi-weekly or monthly before your routine water change to ensure nitrate is not creeping up.
- After changes: Test 24–48 hours after adding new fish, changing filter media, or medicating to see how the system handled the shock,
Before testing your water parameters, ensure your salinity levels are properly calibrated by reviewing our guide on the specific gravity range for marine aquariums.
Frequently Asked Questions
Are aquarium test strips accurate?
Strips are accurate enough to tell you if your tank is dangerously high in ammonia or nitrite, but they are less precise than liquid drop tests. They are excellent for routine checks, but liquid kits are preferred when you need exact numerical values for treatment decisions.
Can I use a pool test kit for my aquarium?
No. Pool kits often test for different chemical levels (like chlorine and cyanuric acid) that are irrelevant to fish health. They also lack the sensitivity required to detect the low levels of ammonia that are toxic to fish. Stick to kits labeled for aquarium use.
What is the difference between KH and GH?
KH (Carbonate Hardness) measures your water’s ability to buffer against pH drops. GH (General Hardness) measures dissolved minerals like calcium and magnesium, which fish and plants need for growth. Both are influenced by your tap water source.
Do I need a test kit if I have live plants?
Yes. While plants absorb nitrates and ammonia, they do not eliminate the need for testing. Plants can die and decompose, causing ammonia spikes. You still need to monitor ammonia to ensure your fertilization schedule (if using CO2) isn’t outcompeting your biological filter.
Why does my pH test read differently in the morning vs. the evening?
pH shifts naturally throughout a 24-hour period due to photosynthesis and respiration. Plants consume CO2 during the day, raising pH. At night, they release CO2, lowering the pH. This fluctuation is normal; you only need to worry if the baseline pH is slowly dropping over weeks.
Conclusion
Finding the right testing method is about balancing your budget, your time, and the specific inhabitants of your tank. For the vast majority of freshwater aquarists, a liquid master test kit is the safest investment due to its accuracy with ammonia and nitrite—the two most critical water quality indicators. However, if you are a casual hobbyist, the speed and simplicity of an 8-in-1 dip strip provides excellent value for monitoring trends. Whichever you choose, the key is consistency. Write your results down, observe the trends, and let that data guide your maintenance routine. Your fish do not have a voice to tell you something is wrong—your test kit is that voice. Regular use will prevent problems, save you money in the long run, and help you enjoy a thriving underwater world.




Leave a Reply